들어가기
지난 시간에 JCenter() 에 Assertion 라이브러리를 올리는 행위를 했었습니다. JCenter()에 올린 Assertion 을 'fluent' API와 같은 AssertJ 라이브러리를 컨셉으로 잡고, 만들기를 시도했습니다.
결과적으로는, 사실 실패했습니다. 만들수 있지만, 그 코드량이 간단하지 않아서 문제였습니다. 그 과정중에 겪었던 내용에 대해서 공유하는 시간을 갖도록 하겠습니다.
AssertJ 란 무엇인가?
joel-costigliola.github.io/assertj/
AssertJ / Fluent assertions for java
AssertJ Fluent assertions for java
joel-costigliola.github.io
Fluent API란 쉽게 생각하면, Method 체이닝을 통해서, 코드를 만드는 것을 말합니다. 간단하게 사용하는 방법은 아래와 같습니다.
// entry point for all assertThat methods and utility methods (e.g. entry)
import static org.assertj.core.api.Assertions.*;

// basic assertions
assertThat(frodo.getName()).isEqualTo("Frodo");
assertThat(frodo).isNotEqualTo(sauron);

// chaining string specific assertions
assertThat(frodo.getName()).startsWith("Fro")
                           .endsWith("do")
                           .isEqualToIgnoringCase("frodo");

// collection specific assertions (there are plenty more)
// in the examples below fellowshipOfTheRing is a List<TolkienCharacter>
assertThat(fellowshipOfTheRing).hasSize(9)
                               .contains(frodo, sam)
                               .doesNotContain(sauron);

// as() is used to describe the test and will be shown before the error message
assertThat(frodo.getAge()).as("check %s's age", frodo.getName()).isEqualTo(33);

// exception assertion, standard style ...
assertThatThrownBy(() -> { throw new Exception("boom!"); }).hasMessage("boom!");
// ... or BDD style
Throwable thrown = catchThrowable(() -> { throw new Exception("boom!"); });
assertThat(thrown).hasMessageContaining("boom");

// using the 'extracting' feature to check fellowshipOfTheRing character's names
assertThat(fellowshipOfTheRing).extracting(TolkienCharacter::getName)
                               .doesNotContain("Sauron", "Elrond");

// extracting multiple values at once grouped in tuples
assertThat(fellowshipOfTheRing).extracting("name", "age", "race.name")
                               .contains(tuple("Boromir", 37, "Man"),
                                         tuple("Sam", 38, "Hobbit"),
                                         tuple("Legolas", 1000, "Elf"));

// filtering a collection before asserting
assertThat(fellowshipOfTheRing).filteredOn(character -> character.getName().contains("o"))
                               .containsOnly(aragorn, frodo, legolas, boromir);

// combining filtering and extraction (yes we can)
assertThat(fellowshipOfTheRing).filteredOn(character -> character.getName().contains("o"))
                               .containsOnly(aragorn, frodo, legolas, boromir)
                               .extracting(character -> character.getRace().getName())
                               .contains("Hobbit", "Elf", "Man");

// and many more assertions: iterable, stream, array, map, dates, path, file, numbers, predicate, optional ...
함수형 프로그래밍 방식으로 Assertion 테스트 코드를 작성 하는 것을 말합니다.
AssertJ는 왜 이렇게 타입(class)이 많을까?
Assert와 같은 Fluent API 를 만들기 위한 시도를 하다보니, 왜 이렇게 타입이 많아지는지에 대해서 알 수 있었습니다.
assertThatThrownBy(() -> new BooleanChecker(true).equalTo(false));
assertThatCode(() -> new BooleanChecker(true).equalTo(true)).doesNotThrowAnyException();

assertThatThrownBy(() -> new IntegerChecker(1).equalTo(0));
assertThatCode(() -> new IntegerChecker(1).equalTo(1)).doesNotThrowAnyException();
이런식으로 코드를 만들어보다가, BooleanChecker, IntegerChecker 둘 다 하고자하는 역할이 동일하다는 사실을 깨달았습니다. 그래서 이를 Checker 라는 클래스를 만들어 역할을 의미하는 바를 인터페이스로 분리했습니다.
private interface Checker {

}
이 Checker 는 다시 equalTo 라는 동일한 역할을 하는 DefaultEqualCheck 라는 것으로 변형시켰습니다.
private interface EqualChecker<EXPECTED> extends Checker {

        void equalTo(EXPECTED expected);
}

private class DefaultEqualChecker<EXPECTED> implements EqualChecker<EXPECTED> {

		EXPECTED actual;

	public DefaultEqualChecker(EXPECTED actual) {
		this.actual = actual;
	}

	@Override
	public void equalTo(EXPECTED expected) {
		if (!actual.equals(expected)) throw new RuntimeException();

	}
}
이렇게 각 클래스가 공통의 역할을 수행한다는 것까지는 표현할 수 있었습니다.
그렇다면, Boolean, Integer 라는 타입을 결정할 수 있게 만드는 것 어떻게 될까요? 여기서 타입이 증가하게 된 이유를 찾을 수 있었습니다.
제네릭 또는 와일드 문자를 사용하면 만들 수 있지 않을까? 싶었습니다. 그러나, 타입을 결정한다고 해도, 문제는 각 타입이 행해야 하는 행동과 역할이 다를 수 있음을 발견하게 됨으로- 각각의 클래스를 만들어야 한다는 것을 깨달았습니다.
private class CheckerProvider {


	public BooleanChecker getChecker(boolean actual) {
		return new BooleanChecker(actual);
	}

	public BooleanChecker getChecker(Boolean actual) {
		return new BooleanChecker(actual);
	}

	public IntegerChecker getChecker(int actual) {
		return new IntegerChecker(actual);
	}

	public IntegerChecker getChecker(Integer actual) {
    	return new IntegerChecker(actual);
	}
}
타입을 결정해줄 수 있는 제네릭을 사용한다고 해도 각 타입의 역할은 다를 것이고, 라이브러리가 되기 위해서는 모든 타입에 대처가능해져야만 할 것입니다. 실제로 AssertJ 의 코드를 살펴보니 아래와 같이 타입이 많았습니다.
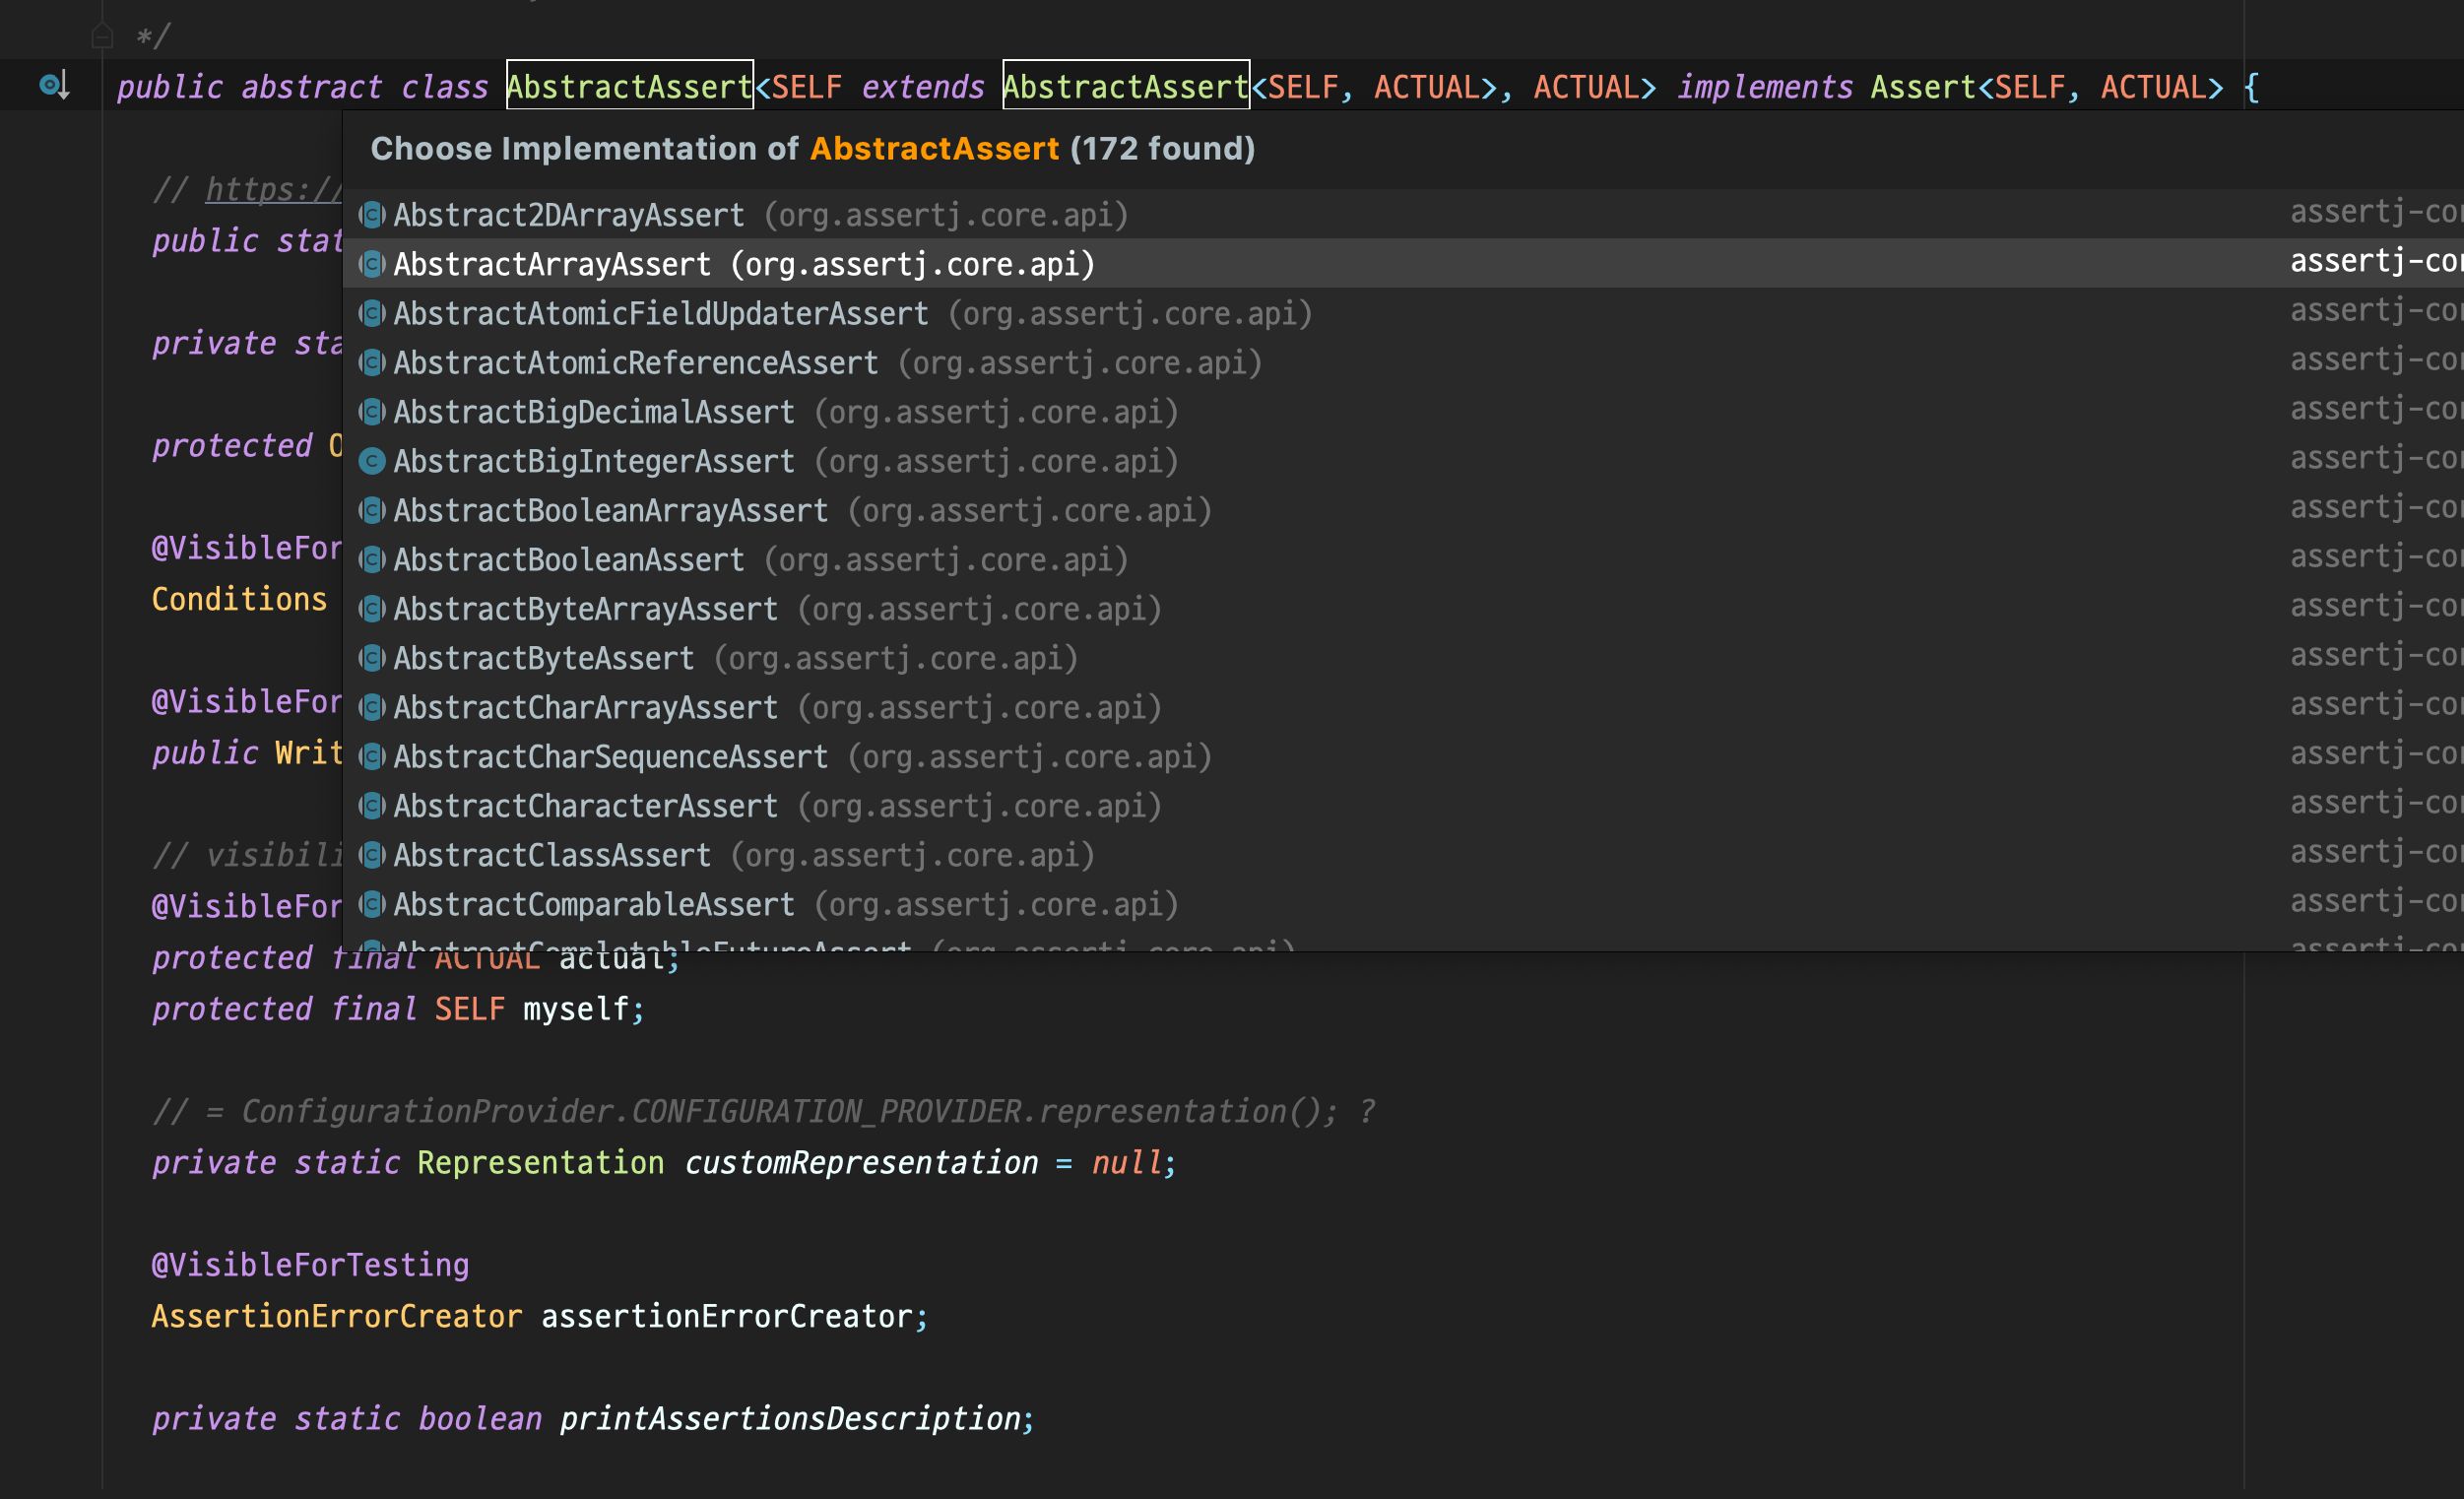
모든 타입에 대해서 구현 클래스를 만들어 표현하고 있습니다. 자바라는 언어는 강타입으로서, 타입이 정해져야만 하기 때문에 어려운게 아닐까? 라는 생각도 들었습니다.
그래서, 어떤 고려해야되는 부분이 어디였을까?
앞서 말한 것처럼,
- 타입이 정해져야만 하는 강타입의 언어를 고려하면 타입이 많아질 수밖에 없다는 부분
- 타입에 따른 역할을 어떻게 정할 수 있는지? 대표적인 예시로, Integer 와 String 은 엄면히 다른 타입이다 같은 Assertion을 줄수 없다는 의미이다. 그럼 각 타입의 역할을 어떻게 선정할 수 있는가?
- 실행 시점을 언제로 잡을 것인가? 언제 예외를 던질 것인고, 어느 부분에 대한 예외를 던질 것인가? 이 말은 즉슨, 메소드 체이닝을 하기 때문에 어디서 예외가 발생할지 모른다는 사실이 있습니다. AssertJ 의 경우, 한 줄씩 체크하면서 예외를 던지지만, 그러므로써, 뒷 부분의 체이닝이 true인지 여부를 판단할 수 없습니다.
Assertions.assertThat(20)
                .isGreaterThan(10)
                .isGreaterThan(15)
                .isGreaterThan(21)
                .isGreaterThan(10)
이런 식일 경우, 21일 부분에서 예외가 발생하지만, 아래 5번째 줄의 10은 통과가 될 수 있을지 알 수 없습니다.
역시 간단한 건 없다.
'Fluent' 하다는 것은 사용하는 입장에서는 뭔가 멋들어지고, 간결하다는 느낌을 받을 수 있지만, 실제로 구현하는 입장에서는 더 많은 생각과 고려를 해야 된다는 사실을 알았습니다.
단순히 가독성이 좋다. 코딩하기 쉽다. 라고 말할 수 있지만, 이는 어디까지나 사용하는 입장에서의 이야기이고, 이를 구현하는 입장에서는 부단한 코드량이 필요하다는 것을 알게 되었습니다.
'가치관 쌓기 > 프로젝트 회고' 카테고리의 다른 글
| '멤버십 환불/해지' 프로젝트를 마치며. (2) | 2022.05.16 |
|---|---|
| 트레바리 Notifier 프로젝트 회고하기 (0) | 2022.02.20 |


댓글