TestContainer
TestContainers 라는 라이브러리는 테스트 코드에서 손쉽게 원하는 모듈을 테스트용도로 띄우고 내릴 수 있습니다.
// add in build.gradle
testImplementation 'org.testcontainers:testcontainers:1.16.3'
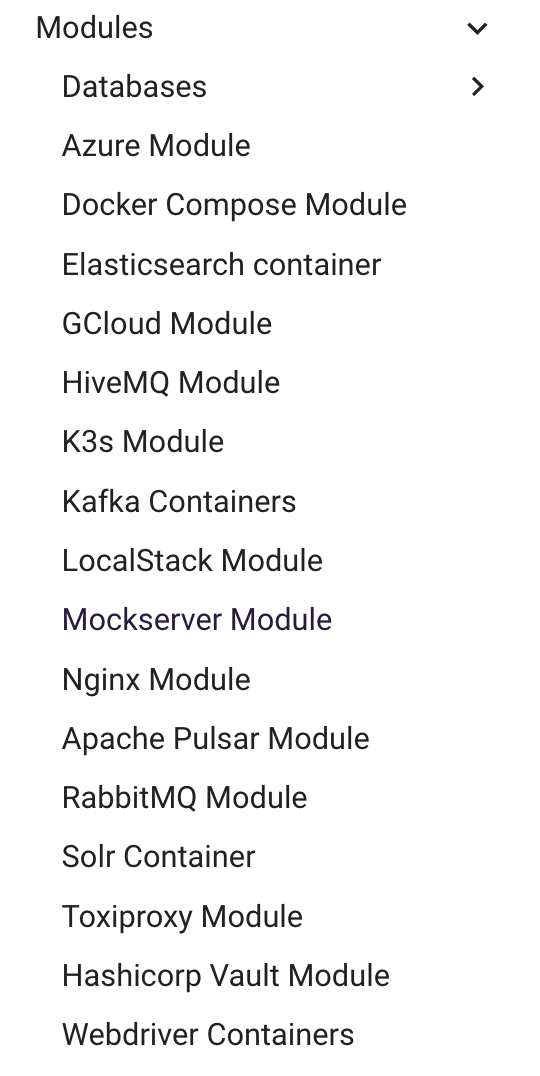
그 외에도 아래 모듈을 테스트에서 테스트만을 위한 모듈을 실행할 수 있습니다.

왜? 이 TestContainers 를 잘 알아야 하는가요?
우리가 운영하는 서비스는 많은 MicroSerivce로 이루어져 있습니다. 그리고, 여러 모듈은 각각의 의존성을 갖게됩니다.
구체적인 예시를 살펴볼게요.

위 아키텍쳐에서는 SERVICE-DISCOVERY와 CONFIGURATION-SERVER 를 활용하고 있다고 가정합니다. 왜 이 두개를 활용해야 하는지 궁금하다면 MSA의 12factors를 참조해주세요.
FRONT-SERVER 관점에서는 CONFIG-SERVER 와 SERVICE-REGISTRY 의 의존성을 가집니다. 이말은 곧, FRONT-SERVER 를 테스트하기 위해서는 항상 이 두개가 동작되고 있어야 함을 의미합니다.
높은 결합도를 가지기 때문에, 우리는 이를 끊을 수 있어야 합니다.
끊기 위한 적절한 도구로 TestContainers가 적절합니다.
어떻게 사용하는지 살펴보겠습니다.
만약 DB 를 사용하는 모듈을 활용한다면, 가장 Simple 한 형태는 아래와 같습니다.
@SpringBootTest
@ActiveProfiles("local")
public class TestContainerTest {
private static final PostgreSQLContainer container = new PostgreSQLContainer(); // Look At this!!
@BeforeAll
static void beforeAll() {
container.start();
System.out.println("container.getJdbcUrl()");
System.out.println(container.getJdbcUrl());
}
@AfterAll
static void afterAll() {
container.stop();
}
@Test
void name() {
}
}
Spring 에서 활용하는 거라면, @Annotation 을 활용해 조금 더 심플하게 사용할 수 있습니다.
@SpringBootTest
@Testcontainers
public class TestContainerTest2 {
    @Container
    static PostgreSQLContainer container = new PostgreSQLContainer();

    @BeforeEach
    void setUp() {

    }
}
만약 DockerHub 으로부터 데이터를 가져온다면 아래와 같이 작성합니다. 공식 Docs
@Slf4j
@SpringBootTest
@ActiveProfiles("local")
@Testcontainers
public class TestContainerTest3 {

    @Container
    static GenericContainer container = new GenericContainer("postgres")
            .withEnv("POSTGRES_DB", "test");
    // Local에서 찾아보고, 없으면 원격에서 찾습니다.

    @BeforeEach
    void setUp() {
        Integer mappedPort = container.getMappedPort(5432);
        // 실제 어떤 포트와 맵핑되어있는지 확인하는 포트
        System.out.println("mappedPort");
        System.out.println(mappedPort);

        container.waitingFor(Wait.forHttp("/hello"));
    }
좋아요.
이번에는 Docker-compose 를 사용해서 작성하는 방법을 살펴봅니다.
@SpringBootTest
@Testcontainers
public class TestContainerTest5_docker_compose {

    @ClassRule
    public static DockerComposeContainer container =
            new DockerComposeContainer(new File("docker-compose.yml"));

    @BeforeAll
    static void beforeAll() {
        container.start();
    }
단순히 컨테이너를 띄우는 것만으로도 테스트의 용이성을 높여주는데요. 조금 더 나아가볼게요.
이번에는 컨테이너를 띄우고 어떻게 스프링부트에서 Containers 의 정보를 활용할 수 있는지 살펴볼게요.
SpringTest 에서는 @ContextConfiguration 라는 Annotation 을 제공합니다. 이것의 의미는 스프링 테스트 컨텍스트가 사용할 설정파일 또는 컨텍스트를 커스터마이징 할 수 있는 방법을 제공합니다.
@ContextConfiguration을 활용하여, Spring의 Configuration 을 세팅 될 수 있도록 합니다.
public static class ContainerPropertyInitializer implements ApplicationContextInitializer<ConfigurableApplicationContext> {
        @Override
        public void initialize(ConfigurableApplicationContext context) {
            TestPropertyValues.of("container.port="+ container.getMappedPort(5432))
                    .applyTo(context);
        }
    }
위와 같은 클래스를 생성 후,
@Slf4j
@SpringBootTest
@ActiveProfiles("local")
@Testcontainers
@ContextConfiguration(initializers = TestContainerTest4.ContainerPropertyInitializer.class)
public class TestContainerTest4 {
...
}
와 같이 작성하여, Configuration 을 커스텀마이징을 할 수 있습니다.
그 외 필요한 설정이 있다면 공식 사이트 를 참조하여 원하시는 것을 찾으시면 됩니다.
감사합니다.
'마이크로서비스' 카테고리의 다른 글
| TestContainer의 docker-compose 활용했지만, 테스트가 통과하지 않았다면? - 활용 (0) | 2022.04.17 |
|---|---|
| AWS Simple Queue Service(SQS) 예제 코드로 다가가기 - #2 (0) | 2021.11.20 |
| AWS Simple Queue Service(SQS) 이론적으로 다가가기 - #1 (0) | 2021.11.14 |
| Eventuate.io 간단 파헤치기 (0) | 2020.10.29 |
| 오케스트레이션(orchestration)과 코레오그래피 (choreography) (0) | 2020.10.17 |


댓글